My vision for my clock is a device that makes time management easier. For example, if i want to be productive for 30 minutes, often I’m guilty of waiting until the next round number, like 4:30, and then work until 5. During an exam, if it doesn’t start on the dot, it takes some time to figure out exactly how much time is left and where you are in the process. I want to make a clock that makes these situations easier.
My idea is a clock similar to your average analog clock, but with a twist. It only has one hand, and we can control how long it takes for it to rotate once. This way, we can use it to time any task we have, and can easily get a feel for how much time has passed relative to the task at hand. You can see a looks like model on the bottom left. It only needs one hand, to track time passed for one task. The dial on the top left side of the clock allows us to reset the clock, and the dial on the right allows the user to input how many minutes one rotation is.
I took apart a cheap IKEA clock (top left) so see what makes a clock tick. I realized that it would be difficult to adapt an existing clock system to make my clock, as I had planned to do. The existing clock as a crystal that has a specific frequency, and gears with a gear ratio set to the rpm of the clock. My whole idea revolves around the user changing the time it takes for one revolution, so after playing around with a bunch of existing analog clocks, I decided to move away from adapting an existing clock.


After thinking about it some more, I’ve decided to make the clock from scratch. I’m going to start with discrete time measurement instead of continuous. I will measure time passing via LEDs. With 12 LEDs connected to 12 digital outputs, I can measure the input time in 12 increments. I realize we lose the visual effects of the hand turning as time passes, since this new idea will only show fractions of time passing. However, the unknown between each fraction would motivate the user to work harder, because they don’t know when time will be up. A bonus of using 12 LEDs is that it still gives the user the familiarity of the 12 numbers on a normal analog clock, so it will be easy to get used to.
The next step for me is to start a proof of concept using Arduino. I’m going to make the LED set up and write the code to make sure I can light up an LED after each 1/12 increment of an input time. Once that works, hopefully my 8-bit DAQ will arrive in the mail, and I can add that component so that the user can input any number between 1 and 63 minutes for a “complete rotation,” or when the 12th LED lights up.
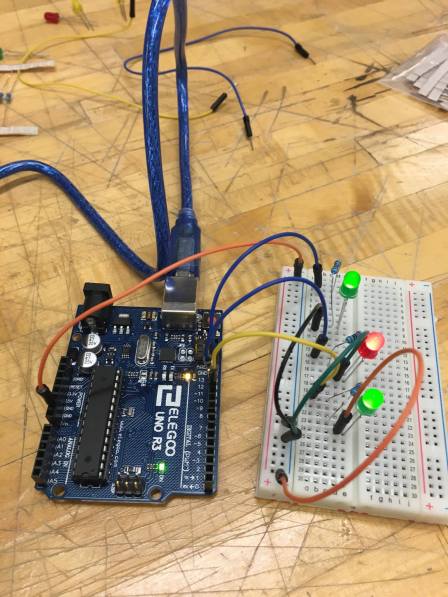
Update:
This is a quick proof of concept of my LED implementation. In my Arduino code, I have a variable time that I can change. The first LED turns on after time/3, the second after 2*time/3, and the third after time. This shows that the lighting up in increments idea can work, and there’s enough outputs on the Arduino to light up 12 LEDs.
My next step would be to figure out how to allow the user to input the time variable without using Arduino code, so that the clock can work without being plugged into the computer.