“Most of what we wear can’t be changed. Because wearables have become relatively cheap, we can buy lots of wearables and mix and match, but we rarely have a chance to change any individual wearable we own. The closest examples I can think of that matches my vision are the scarves that have several configurations, and charm bracelets. My vision for this bracelet is to take charm bracelets to a bigger, and more sophisticated level. I want to make the collection modular, yet not tedious to put together for different occasions. For this project, I plan to have a darker, flexible material for the base, and have clear pieces that slot into the material that can change not only the shape, but the mood of the piece.”
This was my original vision, one that lasted for most of the duration of this project. Soon, you will see how I both stuck to this and deviated from it.
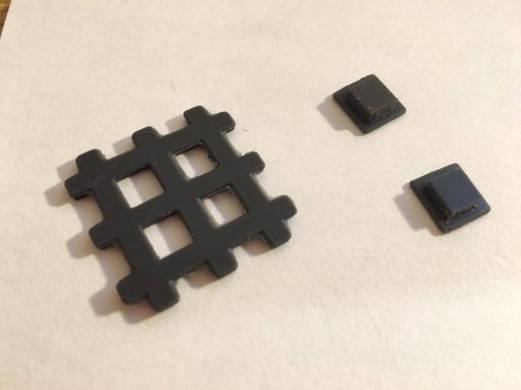
I started with this first proof-of-concept, just a very small unit of what I envisioned my second skin to be. This is just a grid, which serves as a base, and smaller modules that fit into the holes of the base. I thought it’d be cool to allow the user to fit these pieces into any holes as they wish, and in the future we can vary the holes and modules so that the user has more control.


Here are some states of the first proof-of concept – just different ways of inserting the modules. This is pretty simple, but it has its problems. I can imagine that the modules would fall off very easily when being worn. In addition, in hindsight, even though there may be many configurations using this structure, they’d all be very similar. This is like…make your own QR code bracelet! Which is not very exciting.


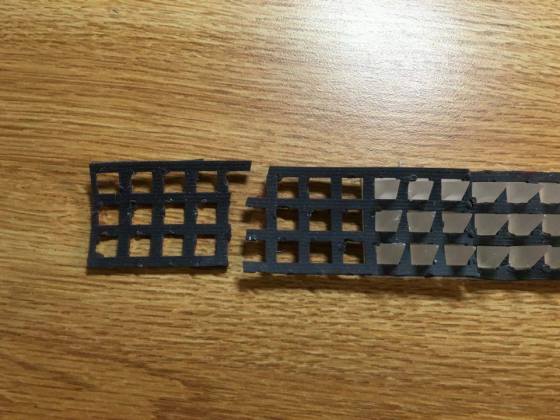
Next, I scaled up to a larger grid so I can test some new modules and the locking mechanism. For the new module, I decided to use the clear resin instead. I printed the base of the module thin enough so that it could still bend a little to mimic the curves on our bodies, and the clear was a nice contrast to the darker flexible resin. The spikes slotted nicely into the grid, but there was no mechanism holding it in place for when the user wasn’t wearing the bracelet. The interlocking mechanism didn’t work well because the scale was so small. You can refer to the CAD to see the two interlocking pieces.


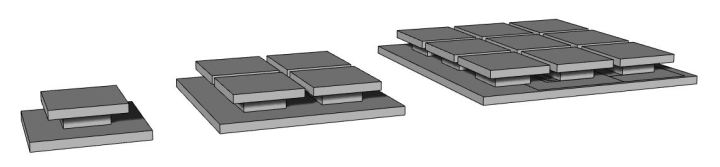
This is the first model of an actual bracelet I made. The grid mostly stayed the same, but I changed the design for how the two pieces lock together. As you can see in the CAD model for the clear spike module, there’s a groove between the spikes and the base of the module, and that’s where the flexible grid would slide in. The locking mechanism is now a 2 x 3 piece with a similar groove.
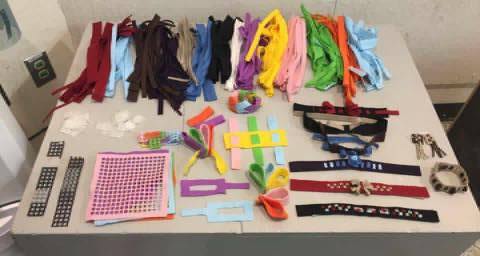
After creating this, I excitedly wore it on my wrist, and it was pretty disappointing. Even though I got it on pretty easily, and it was somewhat durable, it didn’t look, or feel, very appealing. The flexible resin felt all rubbery against my skin, and the clear resin modules are less flexible now that they’ve taken time to cure. In addition, a brief trip in my backpack pocket was enough to snap the flexible resin grid, so it wasn’t so good for this use after all. Jessica and Kate suggested I try fabric, so I bought some felt in many colors at the art supply store.


This is the prototype I made manually to test out the felt. It was really fun playing with the different colors and shapes, and the felt stuck nicely to each other. Still, it was kind of ugly and the clear resin modules contrasted weirdly with the felt pieces. A student during the crit commented that it would be cool to see the fabric attach to each other instead of depending on the connectors, kind of Legos. I agreed, but decided to continue with my original idea with the clear resin connections a bit more.


I replaced the flexible resin modules with the felt, so naturally I started by laser cutting grids into the felt. I used a borderline power so not all the squares came off easily, and it was interesting to see how there was a pattern in the end result. But I digress. Once these pieces came out, I tried to use the old connectors to experiment, and of course they didn’t work. The holes I cut manually in the previous prototype were much smaller than the precisely cut holes, so the connectors didn’t work, and I went through another flurry of iterations to work on tolerances.
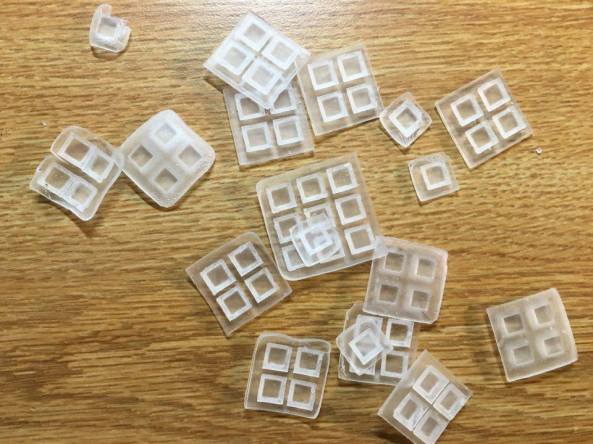
I ended up with tens, and maybe even hundreds of the the connectors shown above. I spent a lot of time chipping away at fractions of inches, trying to make the connectors fit between sheets of the felt grid. I was going nowhere with this. At some point I remembered what the student said about scrapping the connectors, and decided to give it a try.
At some earlier crit, Marcelo talked about how we have bricks for building houses. The bricks make it easier for us to construct the house, while still giving us freedom over how we want our house to look. Of course we do have less freedom than if we were to start from scratch, but the key is to find a balance between the trade-offs and end up with having a simple baseline to work off of while still having freedom to create variation. I decided my brick will be strips, since I feel like if you have enough strips you can make almost anything you wear, and started to just cut up the felt and play around with attachment methods.


This is me doing random things with the felt and not caring too much about how and why, or about the details. I just wanted to cut the strips and move them around, and find inspiration. When I found myself stuck, I gave the strips to a friend.


He made this braided loop structure, which I thought was pretty cool. It helped my expand my brain a bit. I thought it was cool he made this thing I never would have, out of just simple strips. Because of this I wanted to not deviate from the general strip structure so people can have this freedom of playing around with them. So..what can I do to modify the strip module?


This is a quick prototype I made from an inspiration I found online. The attachment mechanism is built into the strips, and I found two cool ways of attaching the two pieces. However, I really didn’t like the hole in the middle, so I ventured on without the hole, looking for other possible attachment methods.


This is more photos of me playing around with the felt. At first I was really excited about using Velcro, but soon realized it was way too flashy and thick for it to work well (top left). A key development in the process can be seen in the photo of the green and purple strips (top right). I attached the purple through two slots in the green strip, and that gave me an idea.


I cut a bunch of parallel slots in a strip of green cloth, and cut a red strip with a width that is about the width of the slot in the green strip. I played around with them, and tried to not be inhibited by previous iterations of this project – I really wanted to think outside the…grid.


Following that train of thought, I made a few more pieces manually, cutting large strips with parallel slots, and more narrow strips to slot through the base strips. I liked how the bow looked, so I made another one with nicer colors. The black and beige (top right) is a choker that fits easily around the neck. For the one on the bottom right, I wrapped a strip around itself and occasionally flipped it, and surprised myself by creating some pretty realistic roses! These patterns can function as bracelets or necklaces – they can be cut down to any length. The slots make it easy to customize to any individual’s wrist of neck size. I liked this direction because the slots are not too visible to make an visual impact on the pieces, yet are super versatile and helpful when the user wanted to use them to slot other pieces of fabrics through. They also solve the problem of fitting on a variety of different individuals.
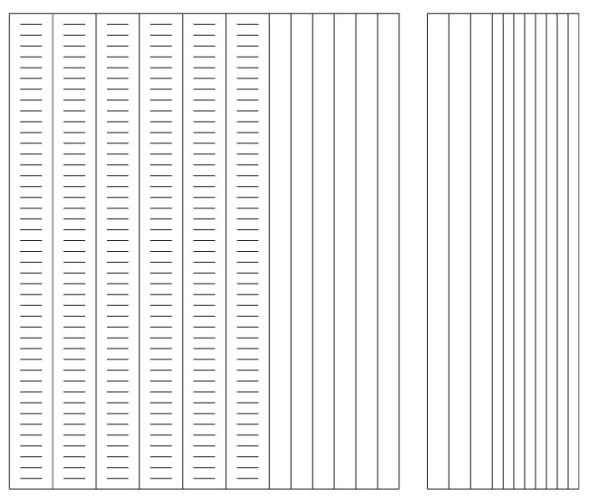 Once I decided on this direction, I shifted to laser cutting. This is the pattern I made in Rhino. On the left are 1-inch base strips, with plenty of 0.5-inch slots 0.25-inch apart. They’re followed by a bunch of 0.5-inch wide strips, as well as 0.25-inch wide strips for variety.


These are the strips straight out of the laser cutter. On the left are my classier collection; on the right a more whimsical collection.
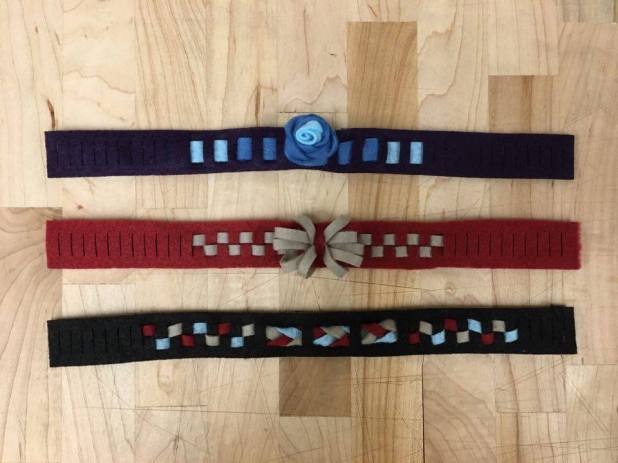
These are some patterns I made from the laser cut strips. From top to bottom: Icy Rose, Christmas Present, and Election Day. For the rose one, I experimented with gradients and multiple colors. For the Christmas Present one, I explored with deviating from the slot and poking into the 3d space, as well as using the skinnier strips. For the last one, I wanted to make a Election Day themed one. These can be fashioned easily into bracelets or chokers!


Here we have a mini collection of a bracelet and earrings – I like to call this Cookies and Cream. The core design can be easily adapted to make other pieces – basically, just cut to the appropriate length!
So this project ended up being a lot different from my first vision, but it’s interesting to see the process of how it evolved. It ended up being more about designing for a design experience rather than a cool, sophisticated bracelet. I think what I ended up with would be a fun toy for kids to explore and make their own jewelry – kind of like blocks or Legos! I guess it can be fun for adults to make too…maybe not jewelry but bookmarks or interior decorations 🙂
I learned a bunch of things from this whole experience.
First, it’s important to not corner myself in the details. For the Enzo chair I dove headfirst into building the chair, and in hindsight I wish I planned it out more. So this time I tried to think a lot more before making and prototyping. I did that, but spent my time thinking about the wrong things. I spent so much time working on tolerances, but I didn’t realize the thing I was making tolerances for didn’t make sense. I should have taken a step back earlier and thought about the bigger picture. Did I really need the 3d printed parts I’m working so hard to make tolerances for? What is the purpose of these parts and can I get rid of them? These are the questions I should have asked myself earlier. So in the future I should be more flexible and if I’m fixated on certain ideas, it’s important to ask myself why I made those decisions; if I don’t know – I should think about other ways of accomplishing the same task, or change my direction all together.
Second, quick prototyping is really useful, and fun! After scratching my grid idea, I needed to ideate, and fast. I literally just started cutting felt and churning out different locking mechanism ideas. If I had an idea, I made it, even if I thought I would never use it, or that it was a stupid idea. The process was really fun and it’s interesting to see how my ideation process eventually led to my final design.
In terms of next steps…because I changed directions kind of late in the game, I didn’t have too much of a chance to give these strips to people and see what they would make. I definitely want to do that and I think we can all be inspired by what different people create!
The end. 🙂
